UV printing on ceramic tiles uses advanced flatbed printers to create stunning designs directly on tile surfaces. This process involves curing special inks with ultraviolet light, ensuring the tiles are dry and ready for use immediately after printing. You can achieve high-resolution graphics with vibrant colors, making it perfect for decorative or branding purposes. Additionally, UV printing offers exceptional durability, resisting water and wear, even in harsh conditions. Its versatility allows you to customize tiles for home décor, art, or interior design, while the streamlined process reduces waste and labor costs.
Key Takeaways
UV printing on ceramic tiles is very strong and long-lasting. It works well indoors and outdoors. The UV inks resist water, damage, and tough weather, keeping designs intact.
Create bright, clear designs with UV printing. This method makes detailed patterns and logos, great for decoration or branding.
UV printing can be used in many ways. It works for home décor, business branding, or art projects, meeting different needs.
UV printing is quicker and easier than older methods. The inks dry instantly, saving time and helping you finish projects faster.
To get the best results, prepare tiles and printers properly. Clean the tiles, use good-quality inks, and test print to check the quality.
Benefits of UV Printing on Ceramic Tiles
Durability and Resistance to Wear
UV printing on ceramic tiles ensures exceptional durability, making it a reliable choice for both indoor and outdoor applications. The UV-cured inks used in this process resist harsh environmental conditions, including sunlight, moisture, and chemicals. This makes the tiles suitable for humid environments like bathrooms or kitchens.
The water-resistant nature of UV inks keeps the designs intact even in damp conditions.
UV-printed tiles withstand wear and tear, making them ideal for high-traffic areas in homes or commercial spaces.
The durability of these tiles ensures that vibrant designs remain unchanged over time, even in challenging settings.
This level of resilience makes UV printing a superior option compared to traditional methods, which may fade or deteriorate under similar conditions.
High-Resolution and Vibrant Designs
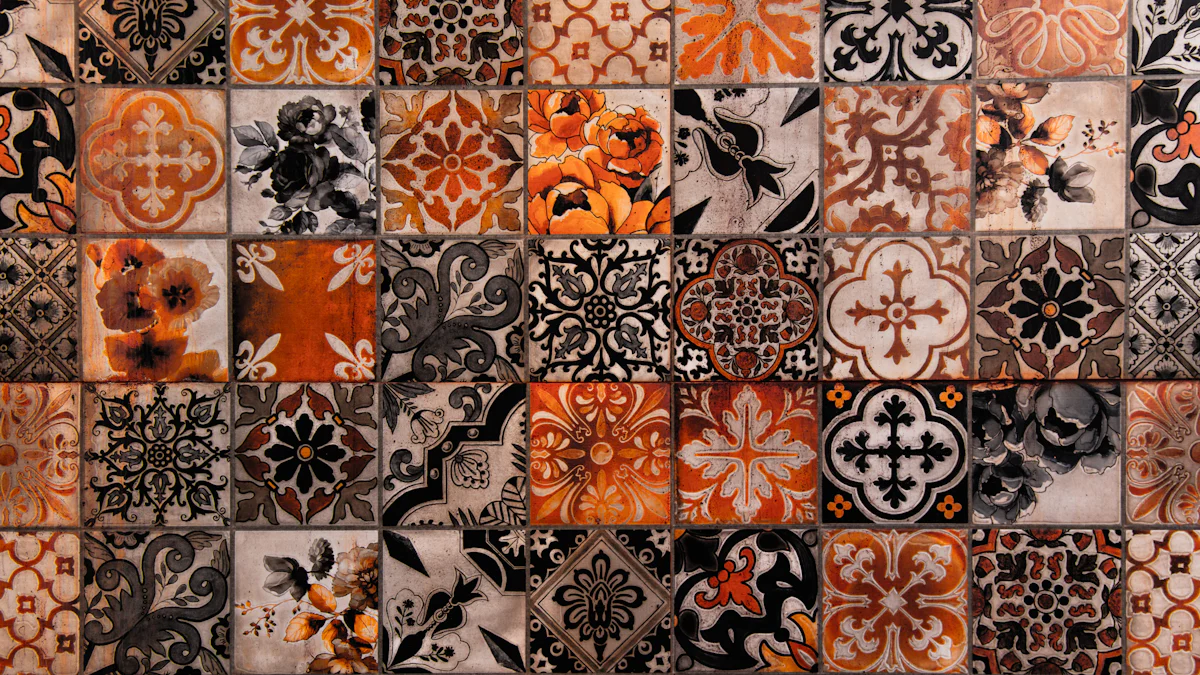
UV printing on ceramic tiles delivers stunning, high-resolution designs with vivid colors. The technology allows you to print intricate patterns, photographs, or logos directly onto the tile surface with remarkable clarity.
UV printers ensure excellent color accuracy and sharp details, making your designs stand out.
The fade-resistant UV inks maintain their vibrancy for years, even when exposed to sunlight.
You can create unique and eye-catching tiles for decorative purposes, branding, or art installations.
For example, UV flatbed printers can transform plain tiles into detailed artworks, perfect for home décor or commercial spaces. This capability makes UV printing a game-changer for creating personalized and professional-quality designs.
Versatility for Custom Applications
UV printing offers unmatched versatility, allowing you to customize ceramic tiles for various purposes. Whether you are an interior designer, artist, or business owner, this technology caters to your specific needs.
You can create custom patterns for residential spaces, such as backsplashes or bathroom floors.
Commercial applications include branded tiles for restaurants, retail stores, or office spaces.
Artists can use UV printing to produce large-scale public art installations or bespoke pieces.
Additionally, UV printing works on a wide range of materials, including plastics, glass, and metals. This flexibility enables you to experiment with different surfaces and achieve consistent, high-quality results.
Faster and More Efficient Printing Process
UV printing on ceramic tiles offers a faster and more efficient way to create high-quality designs. This advanced technology streamlines production, making it ideal for time-sensitive projects. You can complete more jobs in less time, boosting productivity and profitability.
Why is UV printing so efficient?
Several factors contribute to its speed and efficiency:
Rapid curing: UV-LED curing technology dries the ink instantly, eliminating the need for additional drying time.
Improved workflow: Instant drying allows you to move tiles directly to the next stage, reducing delays.
Higher capacity: Faster printing speeds let you handle larger volumes without compromising quality.
Factor | Description |
|---|---|
Print Resolution | Higher resolutions require more time and data processing, slowing down speed. |
Ink Type and Viscosity | Different inks have varying curing times and flow characteristics affecting speed. |
Substrate Material | Type and thickness of material influence ink application and curing speed. |
Printer Configuration | Settings like print head speed and curing lamp intensity are crucial. |
File Preparation | Complexity and size of the digital file impact processing time. |
Maintenance | Regular maintenance prevents clogs and ensures smooth operation. |
Recent advancements in UV printing technology have further enhanced efficiency. Modern printers incorporate faster printing speeds and UV-LED curing systems, which eliminate the need for additional coatings. These innovations allow you to complete projects quickly while maintaining exceptional quality.
By adopting UV printing on ceramic tiles, you can save time and reduce labor costs. This efficiency makes it a valuable tool for businesses and artists looking to maximize output without sacrificing precision or durability.
Step-by-Step Guide to UV Printing on Ceramic Tiles
Preparing the Ceramic Tiles
Cleaning the Surface
Proper preparation of ceramic tiles is essential for achieving high-quality prints. Start by cleaning the surface thoroughly to remove dust, grease, or debris. Use a mild detergent mixed with water to wash the tiles. Rinse them well and let them dry completely. For a more precise cleaning, you can use alcohol to wipe the surface. This step ensures that the ink adheres properly and prevents imperfections in the final design.
Using Adhesion Promoters (if needed)
For porous or unglazed tiles, applying a primer or adhesion promoter can enhance the ink’s grip on the surface. This step creates a uniform base, preventing uneven ink absorption. Follow the manufacturer’s instructions when applying the primer, and allow it to dry fully before proceeding. Skipping this step may result in poor adhesion or faded designs over time.
Setting Up the UV Printer
Adjusting Printer Settings
Before printing, configure your UV printer to match the requirements of ceramic tiles. Select a UV flatbed printer with adjustable print bed heights and high-resolution print heads. Calibrate the printer to ensure accurate color reproduction and proper alignment. Regular maintenance, such as cleaning the print heads, helps maintain consistent performance.
Loading the Tiles Correctly
Place the tiles on the printer’s flatbed carefully to avoid misalignment. Ensure they lie flat and secure to prevent movement during printing. Use the printer’s alignment tools or guides to position the tiles accurately. Proper placement minimizes errors and ensures the design prints exactly as intended.
Printing Process
Selecting and Uploading the Design
Choose a high-resolution digital file for your design. UV printers can handle intricate patterns, photographs, or logos with stunning clarity. Upload the file to the printer’s software and adjust the settings, such as resolution and color profiles, to match your desired output. Test the design on a sample tile to confirm the quality before starting the full print run.
Starting the Printing Operation
Once the design is ready, initiate the printing process. The printer applies UV-curable ink layer by layer, curing it instantly with ultraviolet light. Monitor the operation to ensure the printer runs smoothly and the design prints accurately. This step transforms your plain tiles into vibrant, customized pieces ready for use.
Post-Printing Steps
Curing the Ink with UV Light
After printing, curing the ink is a critical step to ensure the durability and longevity of your designs. The UV flatbed printer uses ultraviolet lights to cure the ink immediately during the printing process. However, a final curing cycle is necessary to complete the polymerization of the ink. This step strengthens the bond between the ink and the tile surface, making the design resistant to fading, scratches, and wear.
To achieve optimal results, allow the tiles to undergo this final curing phase as recommended by the printer or ink manufacturer. This ensures the ink fully hardens and adheres to the ceramic surface. Skipping or rushing this step can compromise the quality and durability of your printed tiles.
Tip: Use a UV curing lamp or the built-in curing system of your printer for consistent results. Always follow the curing time guidelines provided by the equipment or ink supplier.
Inspecting and Finishing the Tiles
Once the curing process is complete, inspect each tile carefully to ensure the print quality meets your standards. Look for any defects, such as smudges, uneven colors, or alignment issues. Discard or reprint tiles that do not meet your expectations.
After inspection, clean the tile surfaces to remove any residual ink or debris. Use a soft, lint-free cloth to avoid scratching the design. For added protection, consider applying a clear sealant over the printed surface. This optional step enhances the durability of the tiles, especially for high-traffic or outdoor applications.
Note: Quality control is essential for maintaining a professional finish. Taking the time to inspect and clean your tiles ensures they are ready for display or installation.
By following these post-printing steps, you can maximize the quality and lifespan of your UV-printed ceramic tiles. This attention to detail ensures your designs remain vibrant and durable for years to come.
Tips for Achieving the Best Results
Selecting the Right UV Printer for Ceramic Tiles
Choosing the right UV printer is crucial for achieving high-quality results. Look for a UV flatbed printer that supports direct printing on ceramic tiles. These printers use UV light to cure the ink instantly, creating a durable and scratch-resistant finish. Yotta’s UV flatbed printers are a great option, offering eco-friendly inks and exceptional print quality. Another excellent choice is the Ceramic Tile UV Printer by JHF Technology Group. It features advanced capabilities like automatic head cleaning and ink circulation, making it efficient for large-scale projects.
When selecting a printer, consider its resolution, speed, and compatibility with ceramic tiles. A high-resolution printer ensures sharp and vibrant designs, while faster speeds improve productivity. Always match the printer’s specifications to your project needs for the best results.
Using High-Quality UV-Cured Inks
High-quality UV-cured inks play a vital role in producing durable and vibrant designs. These inks cure instantly, speeding up production and reducing downtime. They also offer superior durability, resisting scratches, fading, and water damage.
Benefits of high-quality UV-cured inks include:
Long-lasting vibrancy and fade resistance.
Rich colors and precise details for intricate designs.
Environmental friendliness with reduced hazardous waste.
Using premium inks ensures your tiles maintain their appearance over time, even in challenging environments. They also allow you to create unique, personalized designs that stand out.
Maintaining the Printer for Consistent Performance
Regular maintenance of your UV printer is essential for consistent performance. Start by cleaning the printhead daily to prevent clogs and ensure smooth ink flow. Keep the printer surface and workspace clean to avoid dust and debris, which can affect print quality.
Key maintenance practices include:
Test and clean the printhead regularly to avoid printing blanks.
Store UV-cured inks away from light to prevent premature curing.
Inspect the printing film and keep it dry to avoid defects.
Wipe down the printer surface before each use to remove dust.
Neglecting maintenance can lead to issues like clogged nozzles or uneven prints. By following these steps, you can extend the lifespan of your printer and maintain high-quality output.
Conducting Test Prints on Sample Tiles
Test prints are essential for ensuring the quality of your final designs. Before starting a full production run, you should always print on sample tiles to identify potential issues. This step helps you fine-tune your printer settings and avoid costly mistakes.
Begin by selecting a sample tile that matches the material and finish of your final product. Load the tile into the UV printer and upload your design. Use a high-resolution file to test the clarity and color accuracy of the print. Pay close attention to details like alignment, ink coverage, and sharpness.
If the test print reveals imperfections, adjust the printer settings. For example, you can modify the resolution, ink density, or curing intensity to improve the output. Repeat the test until the results meet your expectations. This process ensures that your final prints will look professional and consistent.
Tip: Keep a record of the settings used for successful test prints. This will save time when working on similar projects in the future.
Managing Environmental Factors (e.g., dust, temperature)
Environmental conditions play a significant role in the success of UV printing on ceramic tiles. Dust, temperature, and humidity can all affect the quality of your prints. Managing these factors ensures smooth operation and consistent results.
Temperature Management: Maintain an ambient temperature above 25℃. Low temperatures can increase ink viscosity, leading to nozzle clogs. Use damper heating to keep the ink at an optimal temperature.
Humidity Control: Keep indoor humidity levels between 35% and 65%. Dry air can cause ink to dry prematurely on the printhead, leading to blockages. A humidifier can help maintain the ideal moisture level.
Static Electricity Reduction: Static electricity can damage your printer and disrupt the printing process. Ground the printer, control the printing speed, and use anti-static tools to minimize static buildup.
Note: Regularly clean your workspace to reduce dust. Even small particles can interfere with the printing process and compromise the quality of your designs.
By managing these environmental factors, you can prevent common issues and maintain the efficiency of your UV printer. This attention to detail ensures that your printed tiles will meet the highest standards of quality.
Troubleshooting Common Issues
Addressing Ink Adhesion Problems
Ink adhesion problems are common in UV printing on ceramic tiles. These issues often arise due to the low surface energy of ceramic substrates. To improve adhesion, you can use several strategies:
Apply ink adhesion promoters to prepare the tile surface for better bonding.
Use treatments like plasma or corona to increase the surface energy of the tiles.
Ensure the tiles are properly cleaned and primed before printing.
Surface characteristics, such as texture and porosity, also play a significant role. Smooth surfaces may require additional pretreatment, while porous tiles might need primers to prevent uneven ink absorption. Maintaining an optimal printing environment, including temperatures between 25 °C and 30 °C, ensures proper curing and adhesion.
Tip: Experiment with different pretreatment methods to find the best solution for your specific tile type.
Ensuring Accurate Color Reproduction
Accurate color reproduction depends on several factors, including the substrate composition and printer setup. Ceramic tiles, made from natural materials like clay and minerals, can affect how ink absorbs and cures. Surface texture and porosity also influence the final output.
Factor | Description |
|---|---|
Substrate Composition | Natural materials impact ink absorption and color vibrancy. |
Surface Texture | Smooth or textured surfaces require different pretreatment approaches. |
Porosity | Unglazed tiles absorb more ink, leading to saturation issues. |
Printer Setup | High-resolution printers with adjustable heights ensure precise printing. |
Ink Selection | UV-curable inks designed for ceramics provide durability and vibrant colors. |
Pretreatment Processes | Cleaning and priming enhance ink adhesion and uniformity in color application. |
Printing Techniques | Test prints help fine-tune settings for optimal color accuracy. |
Conducting test prints is essential. This step allows you to adjust printer settings, such as resolution and ink density, to achieve the desired color accuracy.
Note: Always use UV-curable inks specifically designed for ceramic tiles to ensure consistent results.
Minimizing Printer Downtime and Maintenance Challenges
Printer downtime can disrupt your workflow and delay projects. To minimize these challenges, implement regular maintenance schedules. Clean the printhead daily to prevent clogs and ensure smooth operation. Train your team to troubleshoot minor issues, reducing reliance on external support.
Using high-quality consumables, such as UV inks and cleaning solutions, prevents common problems like jams or uneven prints. Monitoring tools can provide real-time insights into printer performance, helping you address potential issues early.
Pro Tip: Keep firmware and software updated to maintain optimal printer performance.
For added reliability, consider investing in a backup printer. This ensures continuity during repairs or maintenance. Establishing a relationship with a trusted service provider also guarantees quick repairs when needed.
By following these strategies, you can reduce downtime and maintain consistent output quality.
UV printing on ceramic tiles offers unmatched durability, vibrant designs, and customization options. By following the steps outlined in this guide, you can achieve professional-quality results while avoiding common pitfalls. Proper preparation, printer maintenance, and environmental management ensure consistent performance.
Take time to experiment with designs and techniques. Testing and refining your approach will help you unlock the full potential of this technology. Whether for personal projects or business applications, UV printing empowers you to create stunning, long-lasting tiles that stand out.
FAQ
What types of ceramic tiles work best with UV printing?
UV printing works well on both glazed and unglazed ceramic tiles. Smooth, non-porous surfaces provide the best results. Porous tiles may require adhesion promoters or primers to ensure proper ink bonding. Always test a sample tile before starting your project.
Can UV-printed tiles be used outdoors?
Yes, UV-printed tiles are highly durable and weather-resistant. The UV-cured inks resist fading, moisture, and temperature changes. For outdoor use, consider applying a clear protective sealant to enhance longevity and protect against extreme conditions.
How do I clean UV-printed ceramic tiles?
Use a soft, damp cloth with mild soap to clean UV-printed tiles. Avoid abrasive cleaners or scrubbing tools, as they may damage the printed design. Regular cleaning helps maintain the vibrancy and appearance of the tiles.
Is UV printing on ceramic tiles eco-friendly?
UV printing is eco-friendly compared to traditional methods. It uses UV-cured inks that produce minimal waste and emit fewer volatile organic compounds (VOCs). Additionally, the instant curing process reduces energy consumption, making it a sustainable choice.
Can I print multiple designs on one tile?
Yes, UV printers allow you to print multiple designs on a single tile. Use design software to create a layout with different patterns or images. This feature is ideal for creating mosaics or unique, customized tiles for artistic projects.